
Last year I bought a really funky border print fabric and I’ve been searching for a jacket pattern to use with it. The pattern repeat is quite short so I needed to be careful with seaming. I’d been reluctantly leaning towards a bomber jacket. Last week I was searching for a parka pattern for another project and came across the Tosti Utility Jacket by Waffle Patterns and thought it would be worth a try.
The Pattern

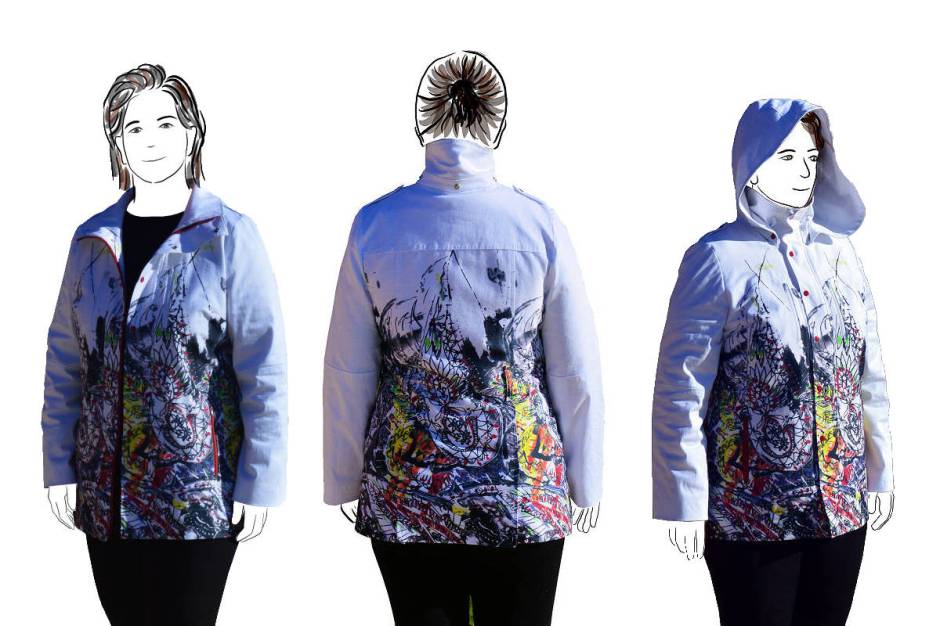
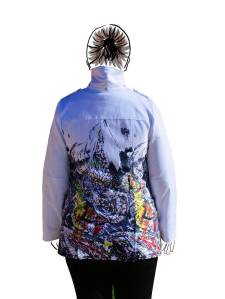
I was drawn to the style of the jacket, especially the seaming on the back. The pattern has a number of different pocket styles to choose from plus a detachable hood. I was drawn to the zippered welt pocket and the fur trim on the hood that was shown in the samples. Alas neither the zippered welt or the fur trim instructions are included in the instructions. The schematic drawing is a better guide to the actual pattern.
I was really impressed with the quality of the instructions. There are a few grammatical mistakes but it is extremely well illustrated. I’ve never sewn a lined vent before, but didn’t have any trouble when following the instructions. The instructions have a coloured background which looks lovely on the screen, but drained my ink cartridges. Next time, I’ll just view the instructions on the screen.
The pattern is a PDF with layers, so you can select which sizes you want to print out. There are A4 and A0 print files included. The A0 has 4 pages. It would have been nice to print it, but the cost of the pattern and printing combined would have been more than the fabric was worth, so I painstakingly taped all the A4 pages together. Finished measurements are given for the bust and waist, but not the hip. So I printed out the size I thought I’d need, plus the size up. The hip ended up fairly narrow, so I graded the pattern out at the hip.
There are shorten/lengthen lines above and below the waist (and elbow on the sleeve). I shortened the pattern 2cm above the waist and 3cm above the elbow. For the lining piece, the adjustment line runs through the extension for the inside pocket. Rather than adjust there, I took the 2cm out just below the bust point on the front facing and upper front lining pieces.
Layout

The fabric is a stretch cotton sateen with the border print running along one selvedge. This meant that the pieces were cut with the stretch running down the body rather than around. I made sure I stabilised the front edges to stop them stretching during construction. The lining is a polyester mesh, chosen mainly to get a slippery lining without making the jacket too hot to wear.
I had a lot of trouble laying the pattern out to work with the repeat on the border print. Working with the large paisley motif, I centred it on the back and matched the princes seams. On the front, the paisley is the same distance from the centre front. I changed the hip pockets to be patched from the inside as there was no way I could match the pattern on pocket’s gusset. The pattern front placket is almost pattern matched but about 10cm off. It was the best I could do.
The collar is the shorter option of the two. It is just under my earlobe. The hood doesn’t have a front facing, so I cut the hood lining from the main fabric, rather than the lining.
The pattern pieces for the linings have some double lines. At first I thought this was a mistake, but there is an extra 6mm added to the widths which is tucked out during construction. I haven’t seen this before. Is this common in coats?
Construction

Sewing the jacket was fairly easy. There are lots of steps and lots of pieces, but they fit together well and the instructions are very good. Seam allowances are 12mm and I had to setup a guide on my machine to keep the seams consistent
The windows for the zippers aren’t sewn with facing to them. If I made them again, I’d use a facing to make turning the window easier. I’d also add the welt in as I think it looks a lot better than the exposed zipper.
Getting the front placket to line up was tricky, despite marking everything as instructed. Turn of cloth will be an issue if you use bulky fabrics, so I suggest cutting the front-most placket a bit wider. I slight overlap of the opposite placket seam is better than falling short!
The pattern pieces for the linings have some double lines. At first I thought this was a mistake, but there is an extra 6mm added to the widths which is tucked out during construction. I haven’t seen this before. My lining was too springy for the tucks, so I eased the tucks (and darts) into the seams.
Finished Jacket
I wasn’t sure how the print would go, but I think it has worked really well with the pattern. The fit is really good.
I’m so glad I found this pattern as I’m really stoked with the result. I’ve mentioned a few things to be aware of, but don’t let it put you off the pattern. There are lots of options for different looks, so it has been a great find.
In the back of my mind, I’d been testing this pattern out to make up a waterproof version in Goretex. I think most of it would translate well. The sleeve cap probably has a bit too much gathering to fit into the shoulder for this type of fabric, so it would need a bit of modification (less ease or a dart). The hood could be changed for a slimmer fit. An alternative would be to make it as is in a cotton and then wax it. Lots of potential there!


At a Glance:
| Pattern |
Waffle Patterns: Tosti Utility Jacket |
| Fabric | Printed cotton sateen outer, nylon mesh lining |
| Difficulty | 3/4 Very detailed instructions which cover various pocket styles (flap, gussets, zippered, double welt), zippered placket and vent. Lots of steps but well explained. |
| End Result | 5/5 – surprised how well the fabric worked with this pattern and using the red hardware. Very unique! |
| Cost | AU$100. incl pattern, thread, interfacing and hardware. Shell fabric approx $65 |

Oh wow this jacket is gorgeous, the use of the border print is perfect. Did you do the snaps?
I really like the lines of this jacket and so glad you mentioned Gortex, and appreciate your thoughts on how to adapt for that fabric.
I’m now off to check out the pattern as I have never heard of them before.
LikeLike
Thanks… although more good luck than planning.
Yes, I set the snaps. They are the prong type, so easy to install. I’m envious of your setting press. I had DH make me up a few dies for setting the roll-type snaps and jeans rivets, but it still relies on a big hammer and the occasional squished digit.
LikeLike
That’s amazing fabric! And (as always) gorgeous work, and beautiful pairing of pattern and fabric. You are inspirational!
LikeLike
Fabulous jacket – I may need to try this pattern out sometime when I get brave enough!
LikeLike
I love your jacket. Have question about construction I am making one and stuck at the collar when do you attach the inside collar to the outside collar??
LikeLike
Thanks. The inside collar is first sewn to the neckline edge of the facing. Then, you sew the facings onto the main fabric as you put the zipper in (so up on side of the front opening, across the top of the collar, and down the other side of the front opening. I’ve then hand sewn the neckline edge of the collars together. Does that help?
Good luck with your coat. I’d love to see your version
LikeLiked by 1 person
Thanks!!! I left another comment sorry I don’t have anyone to help me out so I’m gonna bug you hope thats okay?
LikeLike
I’ll be sure to show you it all finished if I ever finish it lol!
LikeLike
I need help I am sewing this jacket but stuck at page 17 step 9 do I fold it over and then stitch it or do I just iron it down and then what do I do when I attach the front to it at the shoulder do I unfold it or leave it folded and stitch it into the shoulder seam???
LikeLike
Ah – that extra width in the lining. To be honest – I don’t know. I got stumped on that part of the instructions too 🙂
I think folding it over to do a tuck would be fine. My lining was really springy so I couldn’t do this. See my comment under the ‘construction’ section – I just eased the excess in along the full length of the seam.
I haven’t come across a lining technique like this before. If you need a better explanation, I’d suggest contacting Waffle Patterns. I would place a bet on there being others having the same difficulties so she might be able to put up a tutorial on it.
LikeLike